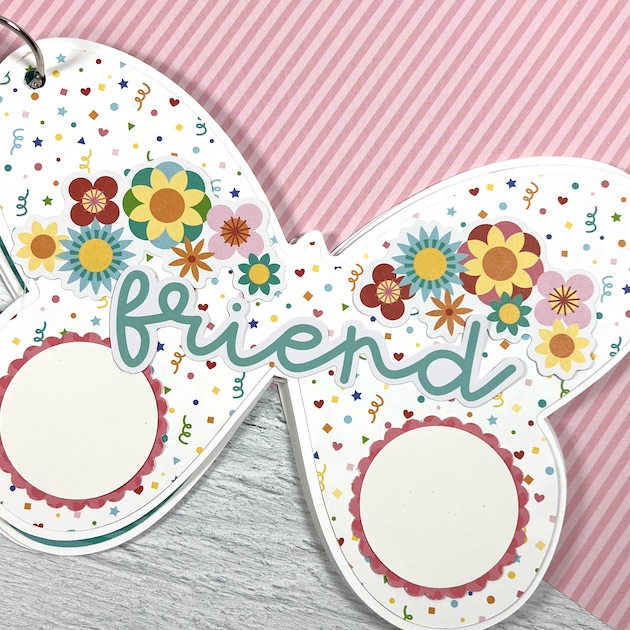
Hey friends! Today, I'm sharing my latest Lori Whitlock project and it's perfect for spring. Last Thursday was National Butterfly Day and I realized ... I've never made a mini album in the shape of a butterfly! So, with the help of two of Lori's amazing cutting files, I created a super cute little butterfly scrapbook. Take a look ...
I chose the first cut file titled Butterfly Set because it had the perfect wings, however it didn't have the separate body piece that I needed. So, I found a second file called Shaped Card Butterfly & used them both!
I thought the delicate patterned cut-outs in the wings were beautiful and would really stand out against some colorful papers. I added the Pinkfresh aqua gems for a bit of sparkle.
Let's take a quick look inside, then I'll walk you through the steps of how I made it ...
I used the file to cut white card stock pages, then covered them in a mix of 12x12 pattern papers from Bella Blvd's Birthday Bash and some Bella Besties prints. Look how cute the colorful polka dots, flowers, and different shaped photo mats are!
Check out this sunny yellow paper ... it's a Besties print called Hearts and Ombre. I love it with those pretty flowers.
I created photo mats for each page in varying shapes and sizes and decorated with lots of cute die cuts.
On this page, I made two round photo mats by punching a 2.5" scalloped circle out of a pattern paper, then a 1 3/4" circle out of white card stock.
Oh, these flowers! So many pretty colors, shapes, and sizes. This Bella Blvd collection is bright, playful, and so much fun. The cute die cuts on this page were from the Doodlebug, Fairy Garden Collection (links below).
March 19th was the first day of the new season and I think this mini is just in time. Hellooooo spring!! 😊
Ok, time for the tutorial! Here's how I made the album with Lori's awesome cut file ...
1. I duplicated the shape first so that I would have a front cover, back cover, and pages.
2. I wanted the pages and back cover to be a solid shape so next I highlighted my second butterfly and clicked release compound path — this separates all of the little inside shapes.
3. I moved the base
butterfly shape off the the left, and deleted the little bits and pieces
that were left behind.
4. Next, I created an internal offset of the solid butterfly so that I would have a smaller shape to cut pattern paper layers.
I cut the cover pieces once, and then cut 5 solid pieces to use as pages. Finally, I cut various pattern papers out of the smaller butterfly.
I've added the product links below. I hope today's tutorial helps you to create your own shaped mini album with Lori's butterfly cut files. She has so many great ones to choose from. Hop over to her shop today and have fun exploring. Happy crafting!


.JPG)
.JPG)


No comments:
Post a Comment