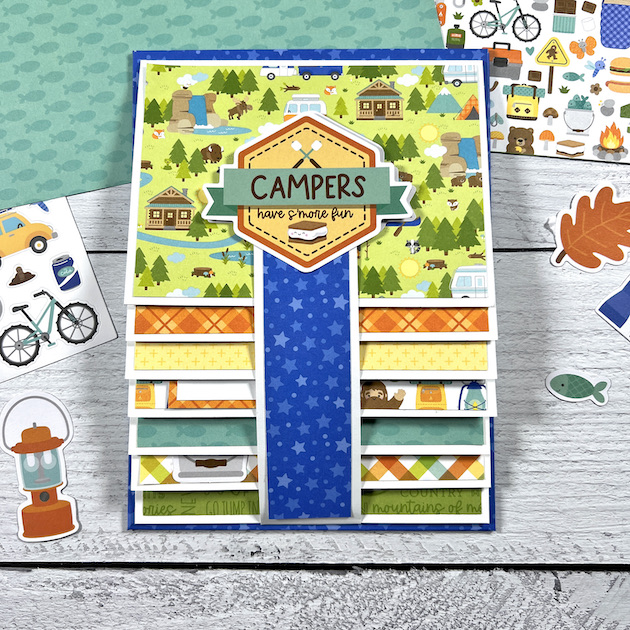
Hello everyone! Today, I'm sharing a really cute waterfall album and the step-by-step tutorial on how to make it. I wanted mine to have a colorful camping theme so I used Doodlebug's Great Outdoors Collection. However, you could use any paper line you want and customize the album for your needs.
I love a great waterfall album. This one is 6x8 inches and I think it looks beautiful with the different colors and patterns layered down the front. I added a pretty blue band with a magnetic closure to keep the pages secure.
I added 14 pages (7 double-sided) and each page has room for photos, journaling, and embellishments.
I think I used every single 12x12 pattern paper in this collection, lol! There are so many cute prints.
I added 4 flippies - 2 are in the picture above. You can tuck a photo behind the "Gone Camping" piece, then document all your adventures on the inside where it opens up to a long journaling card.
To embellish, I used die cuts from the Odds and Ends, stickers from the This and That and a few of the mini icons. (All the product links are listed below.)
By changing the collection, this album could be used for new baby pics, a birthday, winter fun, traveling, summer, any holiday, or a more generic theme with flowers or geometric prints.
2. Adhere chipboard (a) in the center of the score lines and add score tape to the 4 edges. Adhere the four sides down on the chipboard base.
4. Adhere the 1" side of the white card stock band to the bottom of the chipboard base so that the fold of the band is 1/8" up from the bottom edge of the chipboard.
6. Add one side of the magnet to the inside of the band, and the other side to the center of the top waterfall page as shown.


I love this album and paper line. Thank you for being so kind and sharing this one as a free one! All of your work is always amazing!
ReplyDeleteSnapchat filters are like icing on a cake; without them, your party will be missing something interesting! When I host a party, I always set up a special "filter station" where people can take pictures and experiment with different filters for their selfies. This guarantees that all attendees will go home with amazing photos to remember the evening by and ups the ante on the fun factor of the event.
ReplyDeleteCan I still order the camping album that is the top of this?
ReplyDelete