Thursday, September 28, 2017

Halloween Trick or Treat Mini Album Box

Hi everyone! I'm back to share my latest Doodlebug Design Team Project, which is also on their blog today. Their Booville collection is absolutely one of my favorite Doodlebug collections ever! The colors!! I had so much fun with this little mini album and coordinating box. Take a look ...


I covered a Graphic 45 box with different 12x12 papers, and used some chunky twine around the edges (product links below). I adhered a raised chipboard rectangle to the top of the box so that my twine would fit around the sides. The Doodle-pops Witch and Frog are so cute, and I paired them up with glitter sprinkles and some die cuts to make my lid complete!


Inside, I kept it simple and added cardstock, pattern paper, and the cute 4x6 Trick or Treat card to the lid.

The cute mini album inside was super easy. I cut some 4x6 cards out of black chipboard and covered each side with adorable papers. I punched two binding holes in each card before I added photo mats and embellishments. 

Then, I embellished! I have a bad habit of hoarding Doodle-pops, so ... I made myself use some. I added two cute ghost Doodle-pops to the album cover called Sweet Spirits, a round This & That sticker in the center, and some glitter enamel dots for sparkle.

 
Have you played with the new mini icon stickers yet? They were originally introduced for planners (super cute idea), but I love using them in my mini albums too! The little houses above are precious, don't you think? I also added the bat and spider Doodle-pops (called Cute Critters) from the Boos & Brews Collection.
The little Frankie and cars in the photo above are more of the mini icon stickers. I just love their smaller size!

Here's another Doodle-pops. This little skeleton boy is titled X-ray. Ha! Such a clever name!

And below ... I added the Halloween House Doodle-pops from the Ghouls & Goodies Collection and the Pumpkin Pals are from the Boos & Brews Collection.


Well, that's it for me today! Thanks for stopping by and I hope everyone has tons of "spooky" fun with this collection.

To see other projects I made with this Graphic 45 Box, click:  Made with Love Recipe Box, Thinking Outside the Box, Desk Note BoxEaster Box with Album, and Christmas Box with tags.

SuppliesAs an Amazon Associate, I earn from qualifying purchases. Affiliate links are used in this post at no additional cost to you. I receive a small amount of compensation when you click through and shop using the provided links. This helps me to continue building my small business. Thank you!

Wednesday, September 27, 2017

Very Merry Christmas Album with Simple Stories

Hi everyone! Today, I'm sharing my latest Simple Stories Design Team Project with you. Christmas is absolutely one of my favorite times of the year so, playing with some Christmas goodies this week was lots of fun. When I saw the new Very Merry Collection, I fell in love with the traditional red and green colors mixed in with pops of black. So, I decided to use this fun black and white striped binder album and added a big red ribbon around it!

For the inside of my cover, I added a 4x4 card where I will journal that the book is about our 2012 Christmas spent in Georgia.

I thought that this page from the 6x8 paper pad was perfect for the opening page...

We spent the holidays with my sister and her family. Even though it's Georgia, it was a cold winter and my Florida family enjoyed ice skating and bundling up with some hot cocoa. The little snow man die cut was perfect for this page .... 

I love chipboard stickers....and I especially love the Simple Stories chipboard stickers. Here's why ... I always want to see how my piece is going to look on my project before I commit to it.  The fabulous thing about Simple Stories chipboard is that they easily pop out of the packaging with the backing attached (not all chipboard does this).  You can lay the piece down on your project and decide if you like it there or not. 

For the cute snowflakes below, I decided to "like it", so ... I peeled off the backing and stuck them down, overlapping one of the pockets!

Another thing I love to do is cut a plastic page protector that has four 3x4 spaces in half (top to bottom). The piece below, that has the 3x4 "Eat Drink & Be Merry" card, along with a cute pic of my Dad and stepmom is an example. The size difference adds interest to the album, and the elements behind the piece (like the cute pic of my darling Reeci pup) can show from behind.  Don't be afraid to cut things up and make them different than they were originally intended :)   

For my little 1/2 page, I added a tab sticker to the front and back. I LOVE when a company makes stickers that will work back to back! 


We went on a snow-tubing adventure while my family was in town.  My "Florida family" did not have winter coats, but Meme did! My stepmom dug several ski jackets from the 90's out of her closet and the kids LOVED them! We were the brightest, most neon group on the tubing slope, LOL! So much family fun!


I had a lot of fun reliving our crazy "Very Merry" memories when I created this album. I hope you will enjoy playing with this collection as much as I did!


Supplies: As an Amazon Associate, I earn from qualifying purchases.  Affiliate links are used in this post at no additional cost to you. I receive a small amount of compensation when you click through and shop using the provided links. This helps me to continue building my small business. Thank you!
 

Wednesday, September 13, 2017

Doodlebug Challenge: All About Me Pocket Album

Happy Wednesday everyone!  It's Traci, back to share my project for the team's All About Me Challenge.

For my project, I created a pocket mini album with an A to Z theme.  Each letter represents something about me ... something, or someone, I love ... something I like to do ... etc. 
To make my album I used white card stock for the pages, chipboard for the covers, and Doodlebug 6x6 paper pads for the patterns.

First, I cut 26 "pages" --  5 1/4" x 11 1/4", and I scored each piece at the 6 1/4" mark.  Then, I folded each page on the score line to create a pocket.  (Tip:  don't adhere the pocket closed yet).
Next, I adhered two pockets back to back so that each "page" would have a pocket on the front, and one on the back.
Once I created 13 pages (26 sides for 26 letters), I cut my pattern paper.  I used 6x6 petite print paper pads because I wanted a mixture of fun colors and patterns throughout my album.
I cut each 6x6 piece as shown below ... the large piece for the front of the pocket is 5" wide x 4 3/4 high".  The small piece for the top of the pocket is 5" wide x 1 1/4" high, and the remaining piece was set aside as scrap to use later.
 Once all of my pieces were cut, I glued them to each side of my pages, and then glued the right and left sides of my pages down to create the pockets.  I punched holes in each page for my binding rings, and then cut my journaling tags (4" wide x 5 1/2" high).

Each page has a 3x4 photo, a Skinny alpha sticker, and an embellishment.  This was the really fun part!  And by the way, sorry for the shameless plug for Artsy Albums ... it's a big part of who I am so it just had to be my "A" ;)

My journaling is hidden in the pockets, and I printed simple labels for the top of each tag.  There is also room on the back of the tag if I decide to add another photo!


I hope our design team's challenge to create a project "All About Me" is inspiring you to create something that's all about you!!  Have fun with this one and show us what you create over on Doodlebug's Facebook page!

Products used in this project:


Tuesday, September 12, 2017

Bear Hug Card - September Blog Hop with Lori Whitlock


Hi friends! It's time for Lori Whitlock's September Blog Hop and I'm excited to be joining the entire creative team to share our fun projects with you. My blog is the first stop on the hop, but be sure to hop back over to Lori's site for more great project ideas!

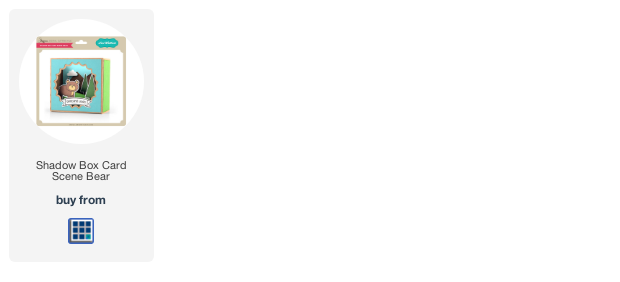
Have you seen Lori's shadow box cards? They are SO cute and she has lots of fun themes. For my project, I created an adorable Bear Hug card. I used the cutting file called Shadow Box Card Scene Bear (link below).

I love these! This card pops open into a 3.5" box shape that can stand alone and then folds flat to slide into an A2 envelope! It's 1.5" deep and features a cute shaped window in the front that displays a magical little scene on the inside. Adorable!

Some of the pieces are print-n-cut files, which makes it super easy to create the sentiments, animals, trees, etc.

I hope you'll continue on to the other designers blogs to check out more awesome designs by Lori!  Your next stop is Kathy's site!

Traci Penrod .. you are here
KATHY SKOU .. your next stop 
Anita MulCahey
Brandie Harding Adams
Brigit Mann
Mitsyana Wright
Michelle Zerull
Tya Smith

Below is the cutting file link. Have fun with this one and happy crafting! 
 

Blog * Facebook * Instagram * Pinterest

Thursday, September 7, 2017

Magical Vacation Disney Themed Scrapbook Album, Say Cheese

Hey everyone! Are you going to Disney or have you been recently? This fun scrapbook is perfect for your favorite photos, character autographs and other "special" mementos from your trip.

 
To purchase the instructions to make this album visit:

It has space for at least 70 photos, which you'll need after taking so many fun pics! It also has pockets and a large envelope to hold park maps, character autographs, tickets, notes, or any other memorabilia.  


The album has (16) sixteen 6x8 inch scrapbook pages (8 front and back), 10 double-sided photo sleeve insert pages, 4 fun shaped insert pages and an envelope.

To purchase the instructions to make this album visit:

As always, thanks so much for stopping by!

Monday, September 4, 2017

My Biltmore Estates Scrapbook Album

Hello everyone! Recently, I had so much fun documenting a trip we took in Fall 2015. I created an album with the new Simple Stories Vintage Blessings collection. Have you seen this collection yet? Oh .. my ... goodness, I LOVE it!! It's a great combination of vintage, family, home, and fall and the colors are awesome. Today, I'm excited to share my new album with you. 


The cover and first page may not look like "travel" themes, but I didn't really want them to.  This trip was about our time together, celebrating life, and touring a beautiful home ... the Vintage Blessing collection worked perfectly.

My husband took me on a weekend trip to Asheville, NC for my birthday.  We stayed at the Grove Park Inn and got tickets to the Biltmore Estate and a Segway tour of the grounds.


The Grove Park Inn was gorgeous ... decorated for the holidays with huge fireplaces, candles, and lots of beautiful Christmas trees. The stickers sum it up perfectly :)


Our segway tour on Saturday afternoon was tons of fun.  We had never done this before but our little adventure turned us into Segway tour junkies ... now we do one on every trip we take!


I think the little houses and vintage tea cups in this line are so cute...perfect for my tour of a beautiful old estate home.


Have fun using Vintage Blessings for all of your fall, family, heritage, and everyday memories this season!  It's truly a beautiful collection ... happy crafting!

Vintage Blessings Products used for this project:
Combo Sticker
So Thankful 12x12 Sheet
Love & Laughter 12x12 Sheet
3x4 Element Sheet
4x4 Element Sheet
4x6 Element Sheet
6x8 Paper Pad
6x12 Chipboard
Bits & Pieces
6x8 Brown Binder Album 


Blog * Facebook * Instagram * Pinterest